
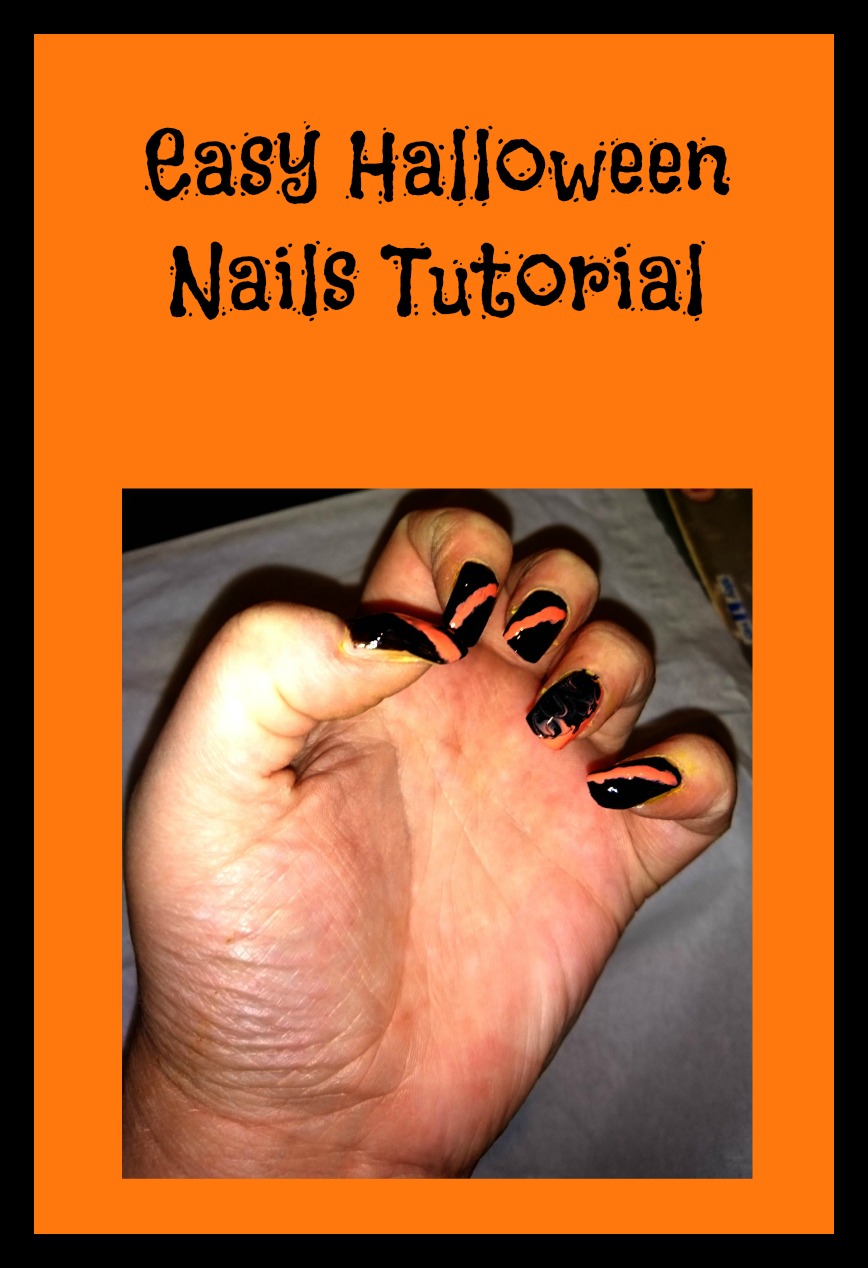
Halloween nails are so fun to do and can really add the finishing touches to your costume, or bring a bit of Halloween fun to a normal outfit if you don’t want to go all out.
Below you will find easy step by step instructions to create your own Halloween nails.
You Will Need:
- Two nail polishes – I’ve used Orange (Rimmel by Rita Ora, Oragasm) and Black (Rimmel Black Out) but you could use greens, purples, deep reds, whatever takes your fancy
- A top coat (I use Sally Hanson Double Duty). This can also be used as a base coat if you choose to use one
- A small, thin polish brush
- A nail art swirler (if you don’t have one and don’t want to buy one, a cocktail stick isn’t a bad alternative)
Create the Look
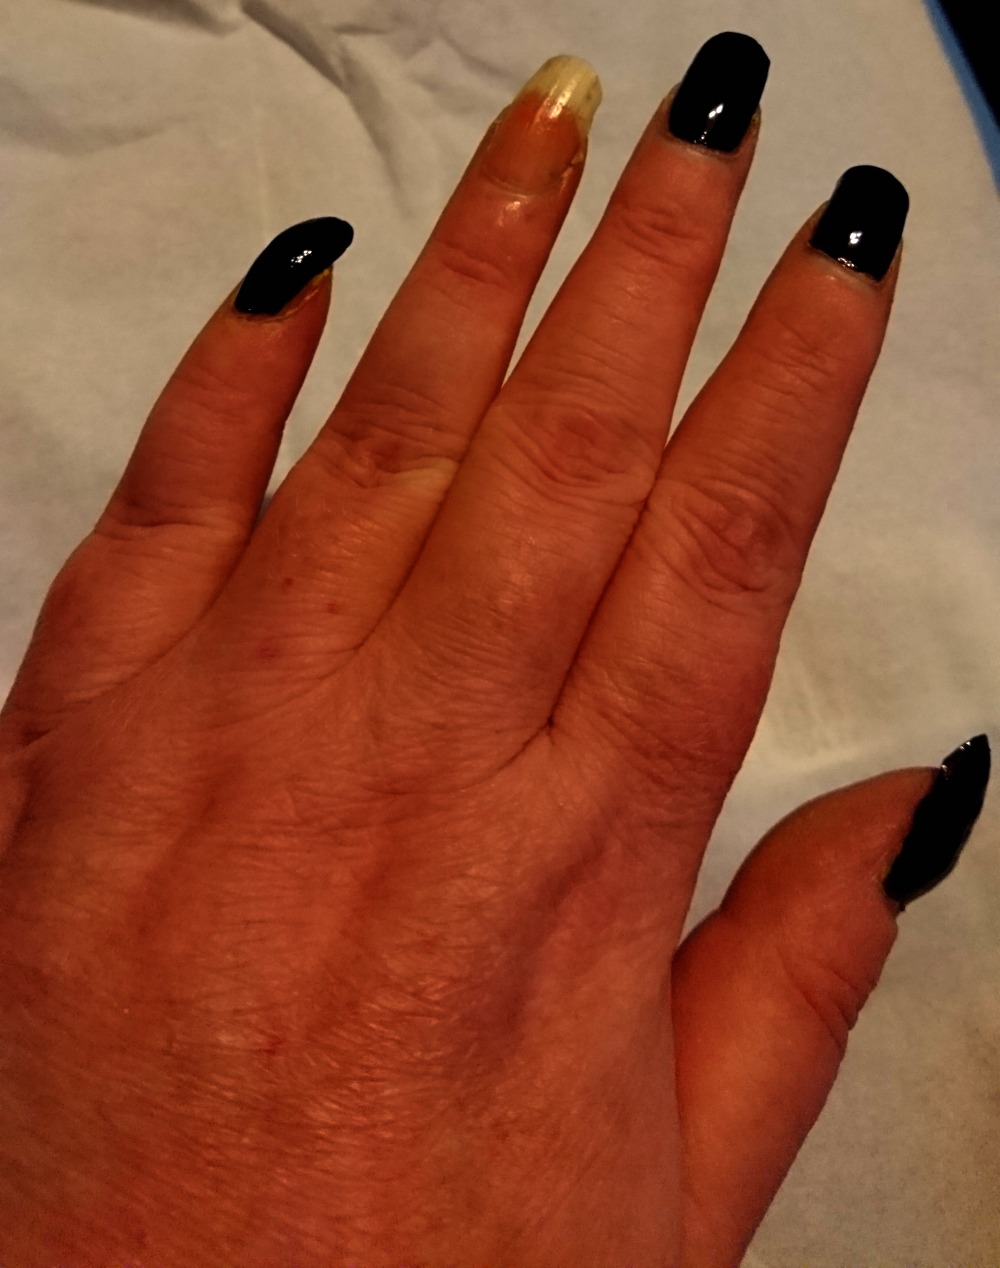
If you want to wear a base coat apply this first and let it dry (I don’t bother with a base coat which is why my nails are constantly stained).
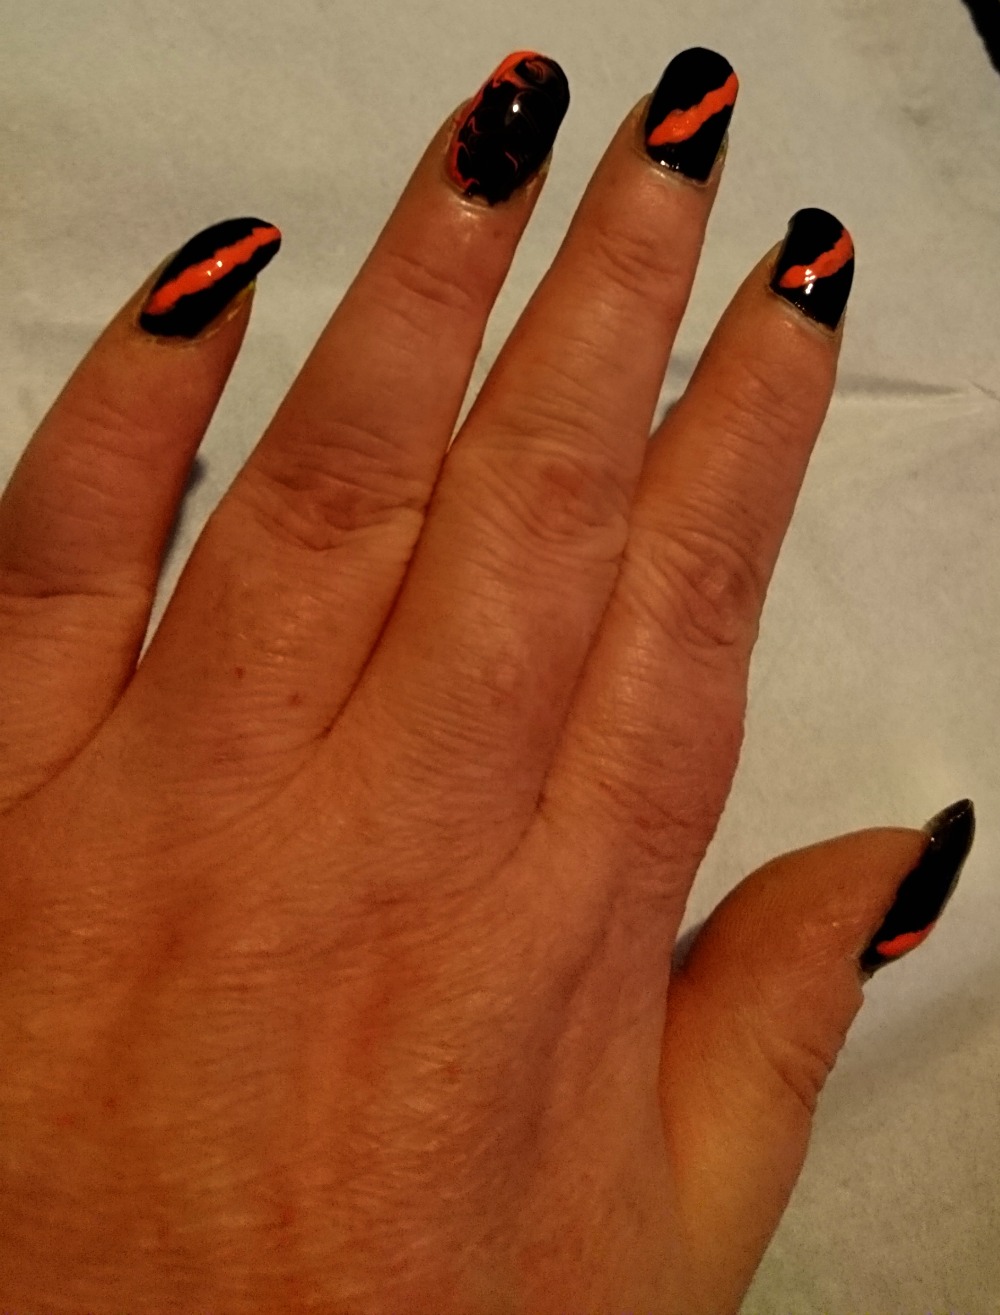
Apply two-three coats of the black polish to all of your nails except your ring fingers.
Make sure the polish is completely dry before you move on to the next step.
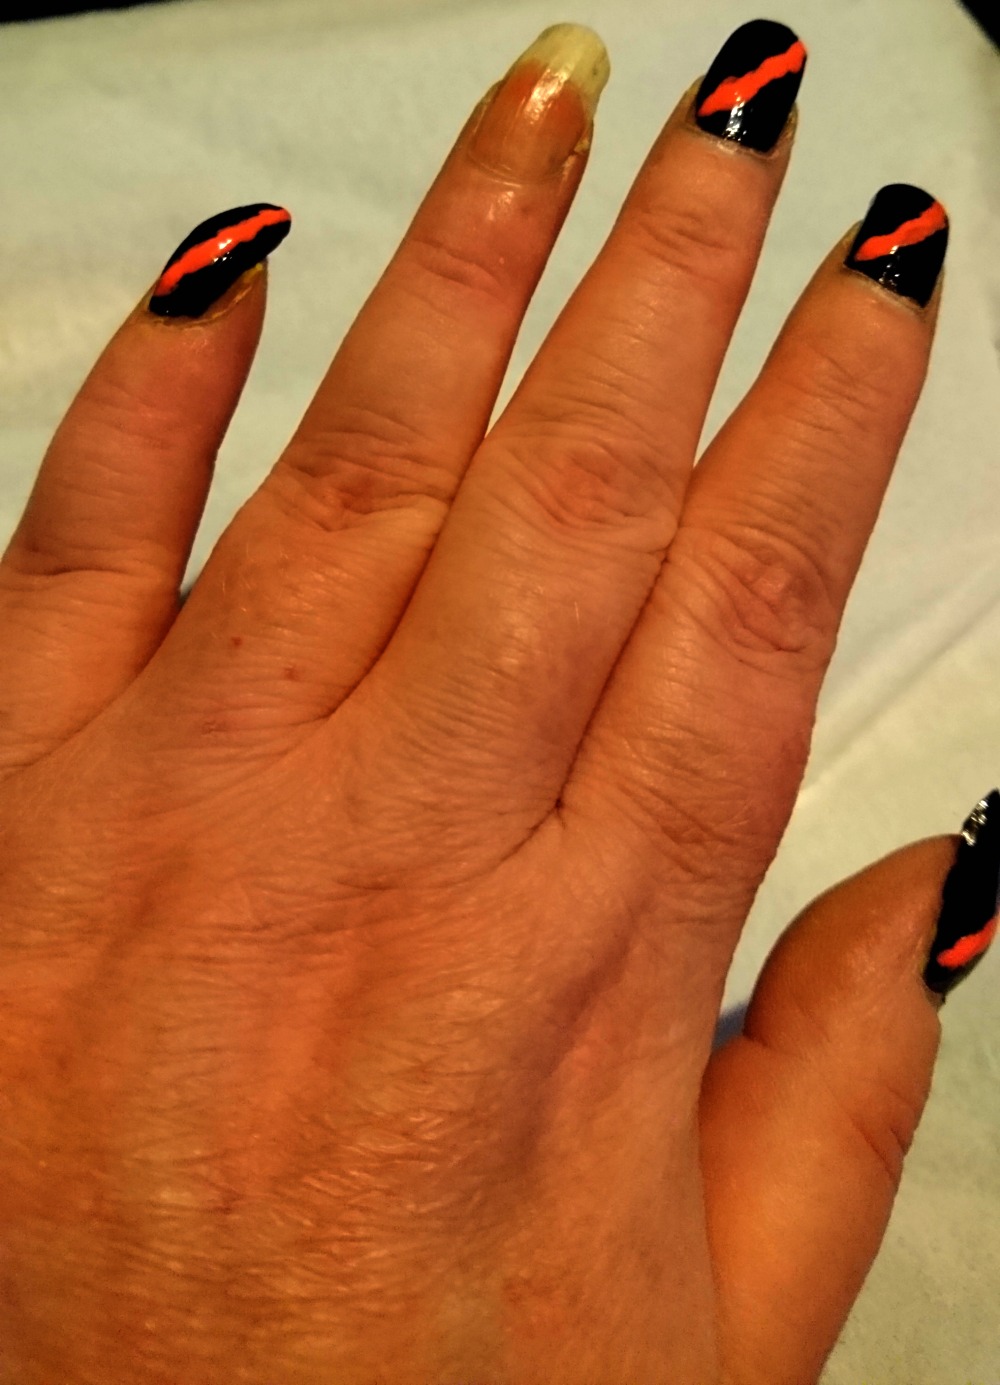
Take the small brush and draw a thin line on the black nails with the orange polish. If your hand isn’t very steady, dot it on at this stage. Start at the bottom left and move up to the top right.
Let the line dry well and then apply another coat. Thicken the line up slightly and if you used the dotting technique, fill in any little gaps.
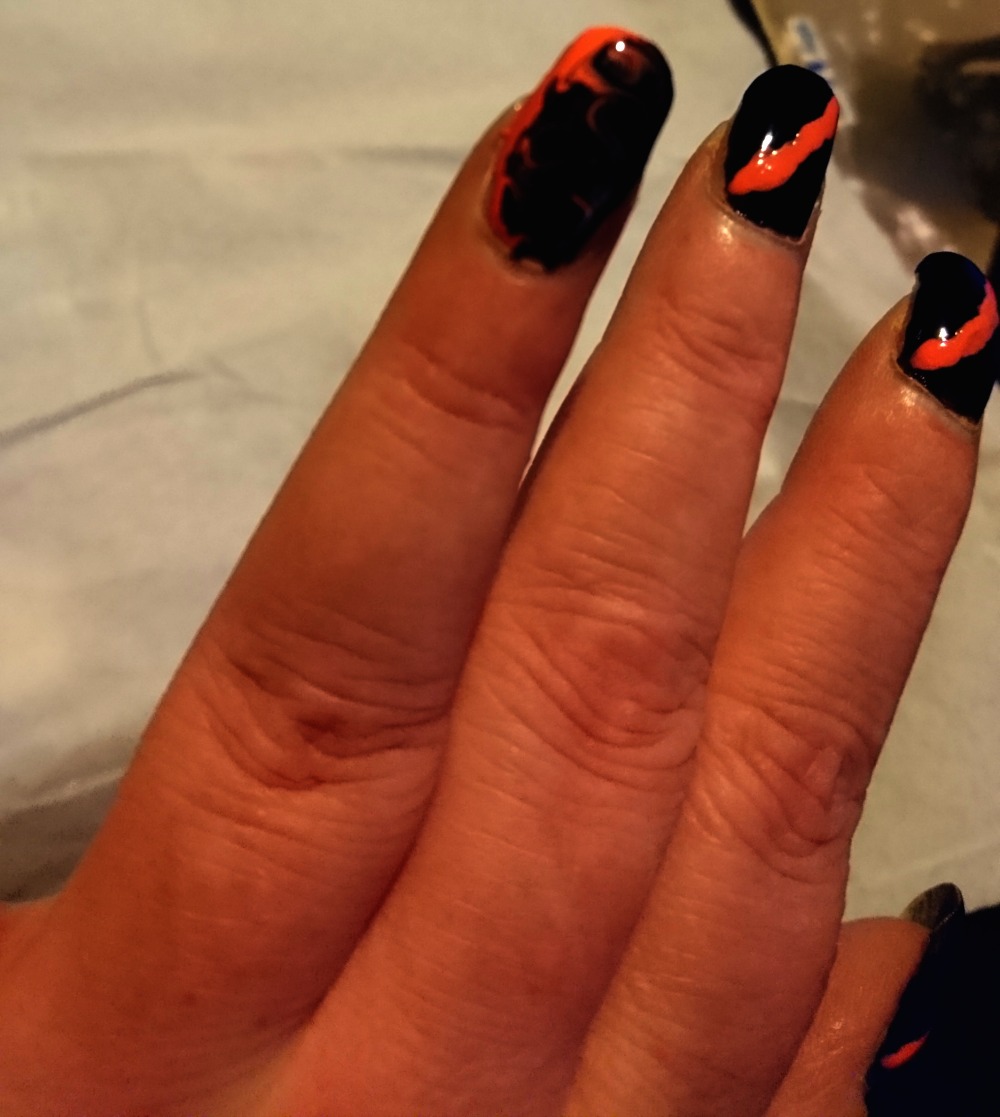
While you wait for the lines to dry, apply one coat of orange to your entire ring finger nails.
Allow it dry completely before moving on to the next step.
On the orange nails, paint a thick coat of orange across the left half of the nail. Apply a thick coat of black to the right hand side, allowing it to go over the edge of the orange a little. You need to do this step quickly before the orange starts to dry.
Immediately, take your swirler. Start at the base of the nail and swirl the polishes together in a clockwise motion moving to the tip of the nail.
Once your nails are all completely dry, apply one-two coats of top coat to prevent chipping and give it a nice glossy finish.
I told you it was easy!
Will you be trying this? Let me know in the comments 
You can find me here: Twitter Facebook Bloglovin Pinterest and Instagram Please do stop by and say hi!
This looks so cool! #AnythingGoes
Thank you
These look brilliant. I love the orange against the black. I’ve got mine shelllac’ed at the moment. Not Halloween colours though.
Oh I wouldn’t do it for a long term look lol
Spooky nails! Fab! #AnythingGoes
Orange and black….classic Halloween #anythinggoes
Classic Halloween colors! I think it would look awesome with black and an acid green type color
Oooh yeah that would look fab!
It’s been a LONG time since I did my own nails, and never anything as fancy as this. I might give this a go (in non halloween-y colours) the next time I decide to paint my nails #AnythingGoes
Nice tutorial. I had thought about doing something like this to my nails for Halloween. But I’m having them done properly as a birthday treat later this week and I got scared I wouldn’t be able to get rid of the black stain! #bloggerclubuk
Loving those! Thanks for sharing. #bloggerclubuk
I love doing my nails, yours look fab. #BloggerClubUK
Goulishly great for Halloween x #BloggerClubUK
Love the nails, great colours for Halloween! #BLOGGERCLUBUK
Great for halloween!
#bloggerclubuk
Aww I missed a trick! We love getting dressed up for Halloween but ran out of time to do my nails this year – we’re all on a downer today now the fun is over!!
I might still give the marbled look a go – looks great! #BloggerClubUK
those look great. My daughter is just reaching the age where she is getting into stuff like this. Its been fun #anythinggoes
I used to do my nails all the time but I can’t remember the last time I did them! Thanks for inspiring me! #BloggerClubUK
Super cute! I’ll have to try these for next year!
#bloggerclubuk
I love getting my nails done but I have never had them painted for an occasion like Halloween. These colours and design would have been perfect for my outfit last weekend!
#BloggerClubUK
So simple and perfect for Halloween #bloggerclubuk
Hi, love the nails it would be a perfect look for clumsy me because if it was messy I would just say it was all part of the look #bloggerclubuk
Ooh I love a good Halloween nail! These look great #bloggerclubuk
I used t be famous locally for my nails always being done in an interesting way but now with all the childcare and housework painted nails only last 24 hours if I’m lucky #anythinggoes
They look amazing, i have terrible nails #bloggerclubuk
Perfect for a halloween party, nails always add an extra something to an outfit.
My mum is obsessed with nail design, I must show her this!
I have to admit I haven’t painted my nails in FOREVER! I really loved halloween this year though as I did some Halloween make up and it was so fun. love these nails! #bloggerclubUK
I hardly ever paint my fingernails. These look great for Halloween, very simple #BloggerClubUK
Lots of fun and have to agree they are the finishing touches #bloggerclubuk
Perfect nails for Halloween. I have to confess I rarely paint mine and am not very good at trying to do any patterns, but I think I could possibly manage something like this. #bloggerclubuk
3 Halloween Nail Art Designs: Fun and Easy - My Random Musings
[…] year I did do a Halloween design for my nails, and this year, instead, I’m sharing some fun looks I found on YouTube that are easy to do […]